
Supplies
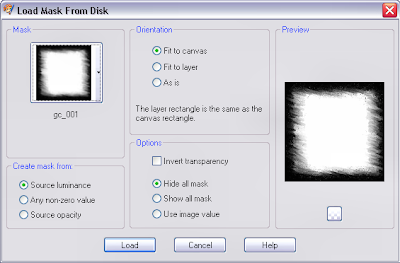
Duplicate this layer, and hide the duplicate, as we won't need it for a bit. Name your layers XOmask and XO. At this point, I have XOmask open and XO hidden. Apply my mask 001 to the open layer, with these settings:
Open frame3 and copy, close the original, and paste as a new layer on your tag. Using your Raster Deform Tool, drag the edges out to almost the edges of your tag, then go to Enhance Photo>Automatic Saturation Enhancement, and choose Normal for both settings, Skintones present UNchecked. Add a drop shadow to this layer: -1,-1, 30, 3, black. Enhance Photo>Sharpen at a setting of 5.
Open frame6, copy and paste as a new layer onto your tag, and close the original. Center the frame on your tag. Select your magic wand and hold down the shift key and select inside all the hearts on the frame. Go to Sections>Modify>Expand, and expand by 7. Do not deselect. Create a foreground background gradient from the two colours of the frame, and floodfill your new layer with it. Go to Selections>Invert, then hit Delete on your keyboard. Move this layer beneath your frame layer, and name it frame back or something similar. Still on this layer, go to Effects>Texture Effects>Blinds, and apply with these settings: Width 10, Opacity 30, color black, light from left top checked.
Remember your hidden wordart layer, layer XO? Move it up above the current layer, (above the slats, below the frame) unhide it, and then go to Selections>Invert, and hit Delete on your keyboard. Go to Enhance Photo>Automatic Saturation Enhancement, more colourful and strong checked. Now add the same drop shadow to this layer.
Open heartstring1 from the kit, resize by 80% and place on the top left of your tag (see my tag for placement) Add the same dropshadow, then add a shadow of 1, 1, 30, 3, black also.
Open the embellishment of your choice, I used balloons7, and place on the top right of your tag, resizing as needed. Add dropshadows.
Open candybox1, copy and past as a new layer, close the original. Place slightly to the left center of the tag; see mine for placement. Add dropshadows. Now add your tube, add dropshadows to your tube and your licence information, add your name, and we're ready to animate!
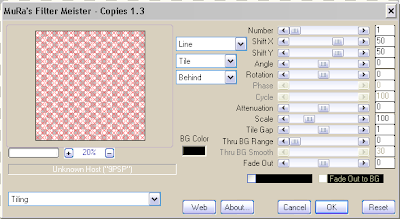
Go back to your XO layer, and duplicate it twice, for a total of three layers. On the original layer, apply Xenofex Constellation with these settings:
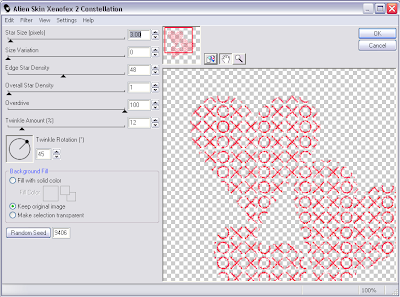
Apply the same settings to each of the other two layers, hitting Random Seed for each layer.
To animate: Hide the two new layers, merge visable, and copy and paste as a new image in Animation Shop. Go back to psp, click the undo button, hide the original Xenofex layer, open the first copy layer; merge image, and copy. Go to animation shop, right click on your image, and choose Paste After Current Frame. Back to psp, undo, unhide your last Xenofex layer, merge visible, and making sure to click into the second frame of your animation, paste after current frame again. Save in Animation Shop as a .gif file, and you're done!